Image Slider

Showing posts with label tutorial. Show all posts

Tutorial : Simple Digital Illustration

October 25, 2016

I'm going to share some of my techniques in digital illustration based on my own noob experience
There are several types of illustration that I do :
  1. Digital illustration using hand-drawn stroke - on Photoshop
  2. Digital illustration using vector - on Illustrator
  3. Digital Illustration or Painting - on Photoshop
My favorite style is by using Photoshop because it will be more flexible to draw on my Wacom tablet almost naturally. The bad side for this technique : It will be a solid illustration, any changes mean you need to wipe it clean and draw it back. The size for the illustration will also be fixed, so you can't really enlarge it from the original size you started. 

Compared to vector : the illustration will be super flexible, you can edit all the points or enlarge it as big as you want but, the styling will be a bit too clean for my liking.

*

To start, you need to know what you want to draw ie : the rough idea. A sketch on paper is good *you can scan it or snap a picture of it and open it on Photoshop, a rough moodboard from images taken from the net is also good - in this case, you can make a layout of what you want to draw and put all the items on the artboard and experiment with the size and location. 

The size :
For any digital illustration that will only be used online : blog, ig, fb, etc - 
Artboard : 1000 x 1000 pixel
Resolution : 150
Colour mode : RGB 
For any printing artwork : poster, brochures, etc -
Artboard : Based on the printing size, it is advisable to use the size of your printing size as a reference. So you will make sure that the size of your illustration will be big enough to be printed later.
Resolution : 300 *the highest
Colour mode : CMYK *test print is your friend. iMac's screen usually show brighter and more colourful screen but your printed items might not.

*

I can't find my pencilled-sketch for this illustration. But yes, I did doodled this on a paper and snap a photo of it using my phone. Then I open a new psd file and paste it on one of the layer. I drew on the upper layer afterwards. 

Here are the items on the illustration, on different layers because I like to rearrange it over and over again until I got something that I like :
*

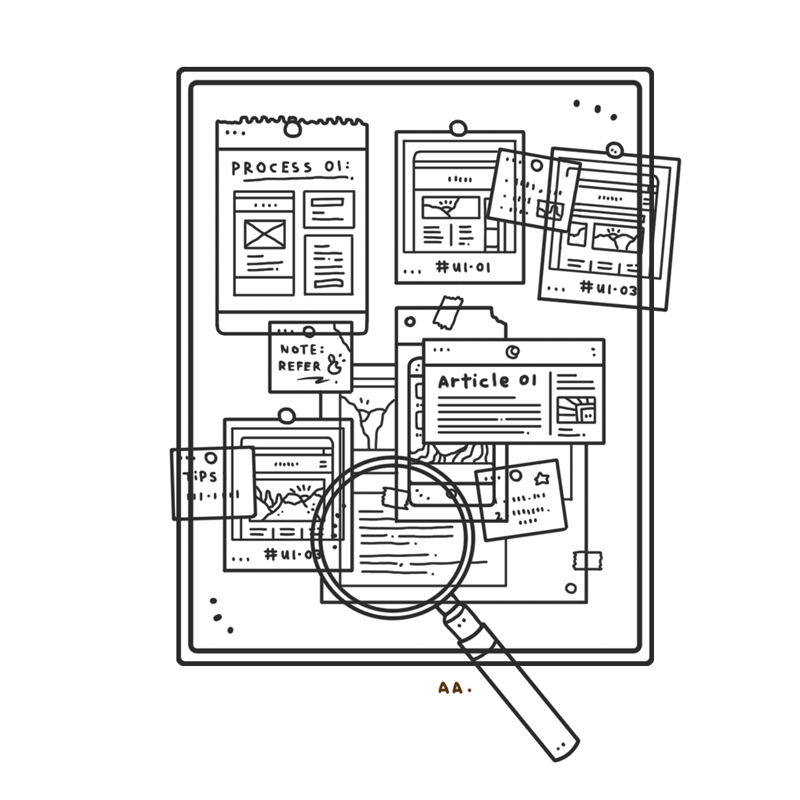
Here is an illustration all arranged and ready to be coloured :
*

And here is the coloured version :
*

See? Illustrations that aren't vectorized always looked a bit personalized. It's my personal favorite style, I really like clean hand-drawn digital illustration like comic. 

Most of my formal works use vectorized illustration because they are easier to amend - *clients are hard to please :F but most of my informal fun projects are in digital hand-drawn illustration. Down below is an example of the vectorized illustration from the same theme above *in lazy version, nothing that makes it look like my work, kan? : 

*

So it depends on you, you can always try few other methods and see which style you like the most. As a visual designer, it is surely useful to know several different methods because you need to illustrate based on your client's need. Designers need to know how to manipulate visual items

But for an illustrator, you need to have your own 'touch' that make your digital illustration came from you only. It's a live-long journey, the more you practice and experiment, the more style you'll come across and you will find something that you like the best that represents you.

DIY : Epoxy Sticker

November 13, 2012

Hello !

Tutorial on making Do-It-Yourself Epoxy Sticker :D

*

Things Needed :

Sticker Paper
Printer
Epoxy Sticker
Scissor

*

1. Get things ready.
In this tutorial, I used Simili Sticker Paper I bought from Popular Bookstore ancient time ago.

*

2. Get it printed.
In this tutorial, I used HP Deskjet 2000.


*

3. Get the epoxy sticker ready.


*

4. Take the epoxy sticker out slowly and stick it on printed paper
Make sure you put it precisely on the printed area.
Use your nail to let the bubble out.
The left one the printed one and the right one is with the epoxy sticker :


*

5. Cut the sticker using scissor.
You need to be extra patient, don't over-cut your epoxy sticker.


*

6. And there you go !
Your own epoxy sticker !


*

If you enjoy this post, share it ya !
Thanks a lot.


*

You can also order epoxy sticker from me.

Size : 3.5 cm

Price : 
RM 1 each , for less than 50 pieces
RM 0.80 each , for more than 50 pieces
RM 0.60 , for more than 100 pieces

Every 10 pieces, you will get 2 pieces free.

Email me : azreen_31@hotmail.com


DIY : Doodle on Wooden Frame

August 04, 2012

*

Hello!

As you might remember, I used to be known as the frame doodler! Months and months ago before I decided to stop making one :D I'm going to share with you my techniques :

*

Tutorial on Doodle Frame
by azreenchan

*

Things needed :

Sand Paper
Artlines
Brush
Acrylic
Clear Spray


Acrylic :
I mostly use Fairbro for arcrylic colour. 
My favorite is Apple Barrel from Plaid.

Artline :
I love to use my famous Faber Castell Size S & M.

*

1. Use sand paper to smoothen the surface.
It will make it easier for you to doodle later.


You will be needed to put several layers of acrylic paint,
depends on the brand itself.


 *

2. Doodle time!
There is no secret in doodling, just start!


*

3. Clear spray
Spray several layer of clear acrylic.
Do it outside of your house.


*

4. Ready!


*

Thanks!

*


Pictures were taken by using :
Nikon D40
I hate watermarks, 
so please be informed that all this pictures are mine, 
thank you.

What I use to Doodle?

January 10, 2012

Hello,

As most people would like to know what I use to doodle, I made this post for you.
I spent hundreds for my stationaries over these 2 years *for fun, experimentation and works.

Reminder : 
This post is done to share my liking towards certain kind of product. You need to remember that everyone has different taste and you should explore that in you. This is not an important fact to know before you doodle because you don't need to have certain kind of pen or certain kind of paper exactly the same as I mentioned. Doodling is supposed to be simple and personal :)

*

1. Artlines 
Usually on paper, I prefer to use Unipin Fine Line. Got several types of size : 0.1- 0.8
Personally I use 0.2, 0.5 and 0.8 because I don't find reasons to use all the sizes in one go.

2. Permanent Marker.
On surface other than paper, I prefer to use Faber Castell permanent marker size S & M.
I've used so many types of permanent marker before, and I think I love this the most. 
I also use Staedler lumocolor on shrink plastic, but I think it is quite hard to find one at art store.
I personally avoid using Sharpie, except on plastic board.
And white board marker on paper is the big NO-NO because over years, it will start to turn brownish. Also, cheap permanent marker also does that. 

3. Mechanical Pencil.
I don't use traditional wooden pencil because the tendency to smear is high and I don't like it when it happens. Been using Pilot for long but some months ago I started to use Pentel because of it is much slimmer. The lead is for sure, Buncho *the best & cheapest of all. 

4. Paint Marker
Oh, I love the color effect of paint marker, but it is so hard to maintain the liquidity. The small sized paint marker tends to clog so often, it's annoying. The big sized paint marker also gives the same effect, you just need to use it frequently I guess.
Personal favorite brand? None.

*

Hurrah!

Reply in the post if you have any other questions :D


Video : How to Start Doodling

January 06, 2012

Hello,

Haven't post any videos for ages.
Here I'm sharing with you some basic things before I start doodling :


*

Back to basic!
Doodling is simple, and what materials you use is not so important.
:)


DIY : Shrink Plastic Tutorial

December 28, 2011

Hello!

 Tutorial on making your own charms using shrink plastic :D
( I DO NOT sell shrink plastic )


I've been wanting to share this tips & techniques with everyone. 
Making your own shrink plastic charms! 

Things Needed :

Shrink plastic
Permanent Marker 
Wooden board
Plier
Small Rings
Knife
Cooking Oven
Acrylic Clear Spray 

*

1. Get things ready.
Personally I prefer to use wooden board & knife.


*

2. Draw your designs on the shrink plastic using permanent marker.
Personally I wouldn't recommend using Sharpie. It tends to smear.
I use Steadtler Permanent Artline instead.
You need to make it big, because it will shrink!


 *

3. Put it in the oven!
Don't put too many at once, it will be hard to pick them up once they are ready.


Setting : 
Whole + 150 °C


It will probably take about 3-5 minutes, 
and they will be like this! :


You will need to wait until it finished shrinking.

*

4. Pick it up slowly using knife, or scissor.
The fussy part is it may be a little crooked if you put too much force.
So pick it up super slooowly.


*

5. Put on the flat board as fast as possible.
You need to flatten it up when it still soft.
Do it on one go to avoid it getting smeared.


My super skinny hand.

*

Tada!


 *

So be extra patient, 
I've done hundreds of this, one by one.


*

6. Spray it using clear acrylic spray.

*

7. Put a ring using plier.


*

And your charm will be ready!

*

Try it!
It may take several attempts to learn tids & bits of it.
It's not really hard, but it is a little fussy, yes.

*

Quality :
I still keep the first batch of my shrink plastic attempt *from 6 months ago
it is still nice, not smeared or dull. 
So it depends on the use of it. I put it as a charm on my Instax.

*