Image Slider

Showing posts with label DIY. Show all posts

DIY : Body & Lips Scrub

January 23, 2015

I have a bad skin, easily irritated by :
  • sweat
  • commercial stuffs eg: make-ups, soap, detergent
  • hormonal season - acne

My skin can vary between being too oily on some part of my face and too dry on some part of my body. I tried drinking juice every morning, also drink 2-3 bottles of water every day, take vitamin C supplement, being picky on what I put on my face and what I eat, I also own oil-blotter all the time. Name it, I can be considered taking care too much or too little, but nothing really help much. 

It's genetic, really. Some people are born with good skin, some people are not born with good and healthy skin, it's not that we don't really care on beauty regime. What I can do is control some things, so the effect won't be too bad. 

*


So I always have to find ways to make some organic things on my own. Internet is the best place to learn almost anything. This time, I tried making my own body & lips scrub because boy, the price of one small bottle of commercial body scrubs in Guardian and Watson are between RM10- RM30. Plus, there are too much of weird chemical names in the ingredient that make me feel uncomfortable :F

*


Note :
I use everything that I can have from my kitchen, except for lemon, that's RM 1 each. After few drops used to be added in the body scrub, I put the remaining lemon into a bottle of water for detox. Most of the western people claim that the best oil are olive and coconut oil, it's almost true, but our country produces palm oil that is almost as good as other vegetable oils in market. 

Mix everything in a bowl and pour it in a bottle. You can keep it in the fridge and take it out 1/2 hour before you take shower - so it won't be too cold. Use body scrub once or twice every week, to exfoliate your skin. Perhaps you can reduce your bills on these items that you can do yourself. 

*


*


*


*

This is how it looks :


I love the light smell of honey and rosemary.

*


Ingredients in one of commercial brand's body scrub - example :
Aqua, Sodium Laureth Sulfate, Acrylates Copolymer, Cocamidopropyl Betaine, Glycerin, Polyquaternium-39, Parfum, Coco-Glucoside, Glyceryl Oleate, Juglans Regia (Walnut) Shell Powder, Sodium Hydroxide, Sodium Chloride, Methylisothiazolinone, Methylchloroisothiazolinone, Prunus Armeniaca (Apricot) Seed Powder, Benzophenone-4, Tocopheryl Acetate, Punica Granatum (Pomegranate) Fruit Extract, Citrus Aurantium Dulcis (Orange) Oil, Citrus Limon (Lemon) Peel Oil, CI 17200, CI 42090, CI 19140.

Kan, it's just too much of big names for such a simple thing O.o
So maybe you can try make one yourself.

DIY : Epoxy Sticker

November 13, 2012

Hello !

Tutorial on making Do-It-Yourself Epoxy Sticker :D

*

Things Needed :

Sticker Paper
Printer
Epoxy Sticker
Scissor

*

1. Get things ready.
In this tutorial, I used Simili Sticker Paper I bought from Popular Bookstore ancient time ago.

*

2. Get it printed.
In this tutorial, I used HP Deskjet 2000.


*

3. Get the epoxy sticker ready.


*

4. Take the epoxy sticker out slowly and stick it on printed paper
Make sure you put it precisely on the printed area.
Use your nail to let the bubble out.
The left one the printed one and the right one is with the epoxy sticker :


*

5. Cut the sticker using scissor.
You need to be extra patient, don't over-cut your epoxy sticker.


*

6. And there you go !
Your own epoxy sticker !


*

If you enjoy this post, share it ya !
Thanks a lot.


*

You can also order epoxy sticker from me.

Size : 3.5 cm

Price : 
RM 1 each , for less than 50 pieces
RM 0.80 each , for more than 50 pieces
RM 0.60 , for more than 100 pieces

Every 10 pieces, you will get 2 pieces free.

Email me : azreen_31@hotmail.com


DIY : Doodle on Wooden Frame

August 04, 2012

*

Hello!

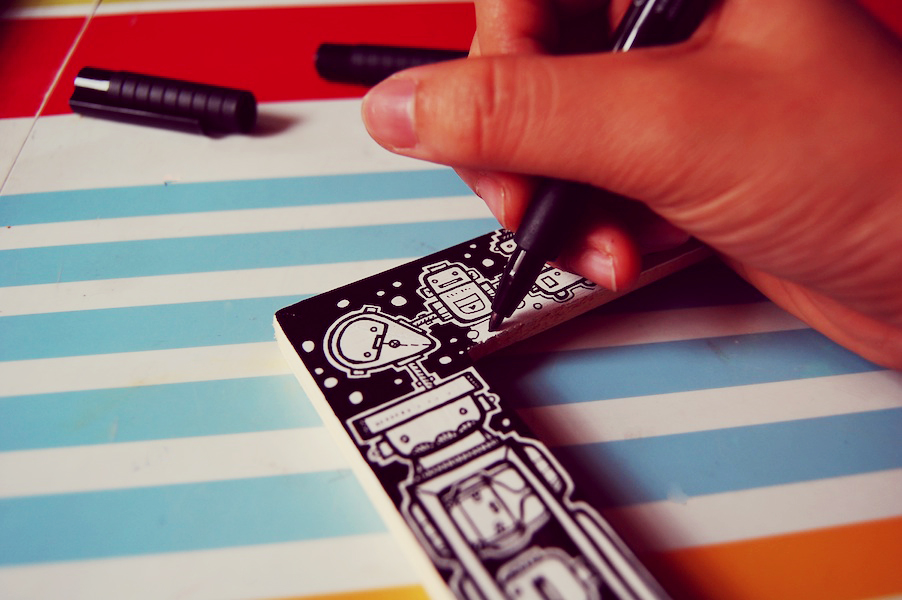
As you might remember, I used to be known as the frame doodler! Months and months ago before I decided to stop making one :D I'm going to share with you my techniques :

*

Tutorial on Doodle Frame
by azreenchan

*

Things needed :

Sand Paper
Artlines
Brush
Acrylic
Clear Spray


Acrylic :
I mostly use Fairbro for arcrylic colour. 
My favorite is Apple Barrel from Plaid.

Artline :
I love to use my famous Faber Castell Size S & M.

*

1. Use sand paper to smoothen the surface.
It will make it easier for you to doodle later.


You will be needed to put several layers of acrylic paint,
depends on the brand itself.


 *

2. Doodle time!
There is no secret in doodling, just start!


*

3. Clear spray
Spray several layer of clear acrylic.
Do it outside of your house.


*

4. Ready!


*

Thanks!

*


Pictures were taken by using :
Nikon D40
I hate watermarks, 
so please be informed that all this pictures are mine, 
thank you.

Doodle & Sketches

July 16, 2012
*

Hello !


*

Currently I am doing a personal project, experimenting doodle in large scale! I've been wanting to vandalize a space and at last I got a space for my own to doodle on :

 Will finish in few more weeks I think, due to my tight schedule.


*

Remember those little wooden pendant I did last year? These are whats left, I put it on my wall :


*

Happy doodling guys!

Food : Home Made Tutti-Frutti Yogurt

July 10, 2012

*

Hello!

I've been a fan of Tutti-Frutti and Moo for awhile now. Maybe I've tried 5 times now, knowing they are quite overpriced for my liking. So I've decided to try to make my own iced yogurt *using natural flavored yogurt .

1 small bowl of natural yogurt
2 spoon of sugar
Minced yellow watermelon
Minced chocolate

Put it in the fridge *the ice-box for over an hour.


My own critiques :
I've decided to dislike the taste of minced chocolate in this. It would probably tasted better if I put another spoon of sugar and blend it with ice. Should probably try other fruits next time. 

This is much much much cheaper than those frozen yogurt. 


*

I am full.


*

Second attempt :


1 small bowl of natural yogurt
2 spoon of sugar
Minced red watermelon


This time, I didn't put any minced chocolate and I changed it to red watermelon, which tasted super delicious. But I put it in the ice-box for 2 hours, resulted the yogurt to be truly frozen and I had to wait before I can eat it. 

Why I didn't use blender? Because I have none and I am trying to experiment with things that are simple and reachable in my kitchen. 


*

DIY : Shrink Plastic Tutorial

December 28, 2011

Hello!

 Tutorial on making your own charms using shrink plastic :D
( I DO NOT sell shrink plastic )


I've been wanting to share this tips & techniques with everyone. 
Making your own shrink plastic charms! 

Things Needed :

Shrink plastic
Permanent Marker 
Wooden board
Plier
Small Rings
Knife
Cooking Oven
Acrylic Clear Spray 

*

1. Get things ready.
Personally I prefer to use wooden board & knife.


*

2. Draw your designs on the shrink plastic using permanent marker.
Personally I wouldn't recommend using Sharpie. It tends to smear.
I use Steadtler Permanent Artline instead.
You need to make it big, because it will shrink!


 *

3. Put it in the oven!
Don't put too many at once, it will be hard to pick them up once they are ready.


Setting : 
Whole + 150 °C


It will probably take about 3-5 minutes, 
and they will be like this! :


You will need to wait until it finished shrinking.

*

4. Pick it up slowly using knife, or scissor.
The fussy part is it may be a little crooked if you put too much force.
So pick it up super slooowly.


*

5. Put on the flat board as fast as possible.
You need to flatten it up when it still soft.
Do it on one go to avoid it getting smeared.


My super skinny hand.

*

Tada!


 *

So be extra patient, 
I've done hundreds of this, one by one.


*

6. Spray it using clear acrylic spray.

*

7. Put a ring using plier.


*

And your charm will be ready!

*

Try it!
It may take several attempts to learn tids & bits of it.
It's not really hard, but it is a little fussy, yes.

*

Quality :
I still keep the first batch of my shrink plastic attempt *from 6 months ago
it is still nice, not smeared or dull. 
So it depends on the use of it. I put it as a charm on my Instax.

*